Applications Management
Release Creation Process
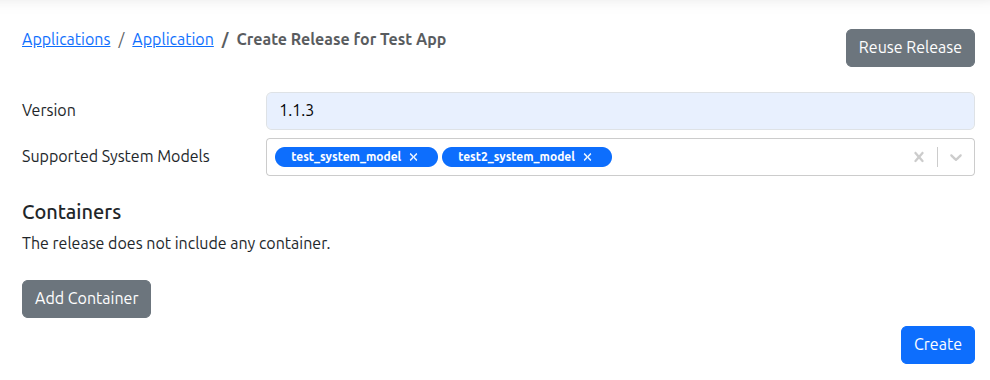
To create a Release in Edgehog:
- Navigate to the Applications section in the Edgehog web interface
- Open the app for which you want to create a release
- Click on Create Release action button
- Fill in the release form:
- Version: Enter a unique version number that follows the Semantic Versioning spec
- Supported System Models: Choose system model(s) which the release should support. If left blank, the release supports all devices
- Add container(s) by clicking Add Container button (see Container creation for more details)
- Click Create to create the release
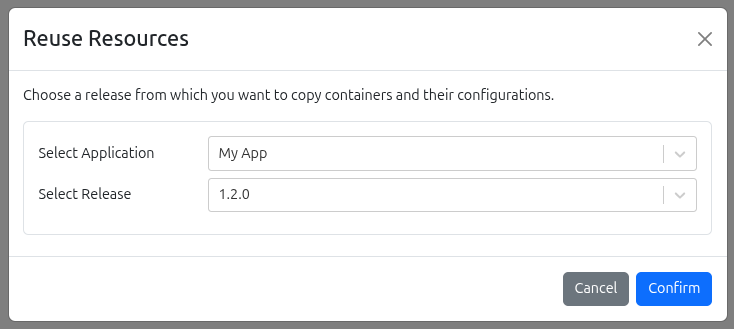
Reuse Release Configuration
Edgehog also let's you reuse existing containers and their configurations from the same or some other application.
To reuse a Release:
- Click on Reuse Release button in the Create Release page
- Choose application and release from which you want to copy containers and their configurations
- Click Confirm to import release configuration
Container Creation
By clicking the Add Container button on the Create Release page, a form for specifying container configuration is displayed. The form is organized into logical sections:
- Image Configuration
- Network Configuration
- Storage Configuration
- Resource Limits
- Security & Capabilities
- Runtime & Environment
- Device Mappings
Below is an overview of each section.
Image Configuration
 Specify the image that will be used to run the container.
Image Reference – represents the name of the image to pull. It follows the pattern:
[registry-host[:port]/][image-repo/]image-name[:(tag|digest)]For more details, refer to Images
Image Credentials – Select credentials if the image is stored in a private registry. For more details, refer to Image Credentials
Network Configuration
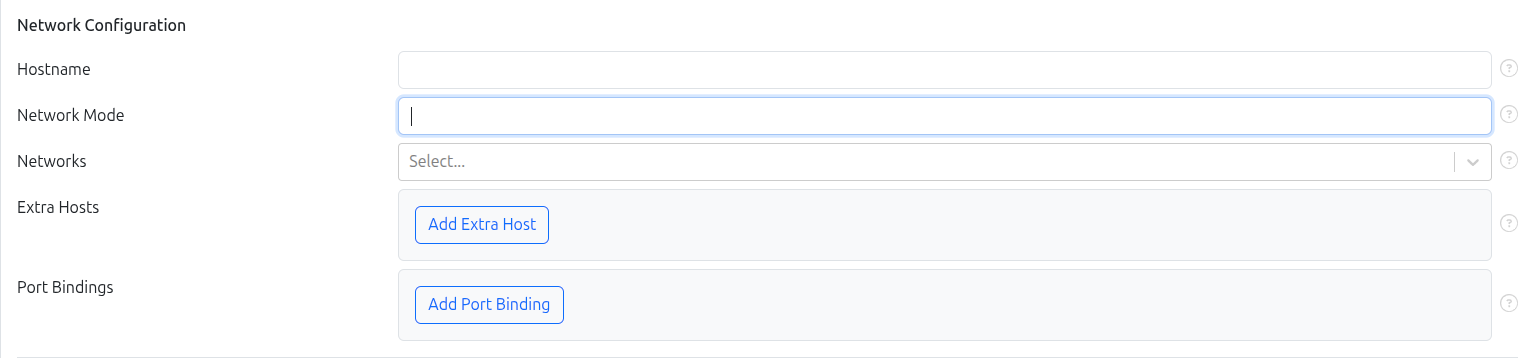
Define how the container connects to networks.
- Hostname: refers to the name a container (or host) uses to identify itself on the network and in its own environment. If you don’t set anything, a container’s hostname defaults to its container ID.
- Network Mode: controls how a container is connected to networks and what network namespace it uses. When network_mode is set, networks: is not allowed .
- Networks: Attach the container to one or more previously created networks. For more detailed information on creating and managing networks, refer to the Network Management page.
- Extra Hosts: Adds entries to the container’s /etc/hosts file so name resolution for those hostnames bypasses DNS and uses the IPs you specify. Format is
HOSTNAME:IP. Special value host-gateway resolves to the host’s internal IP. - Port Bindings: Port bindings control how ports inside a container are made accessible on the host and beyond. By default, a container’s ports are not accessible from the host; they’re only reachable from the host itself and containers on the same bridge network. To make a port reachable from outside the host (or from other networks), you must publish it.
Storage Configuration
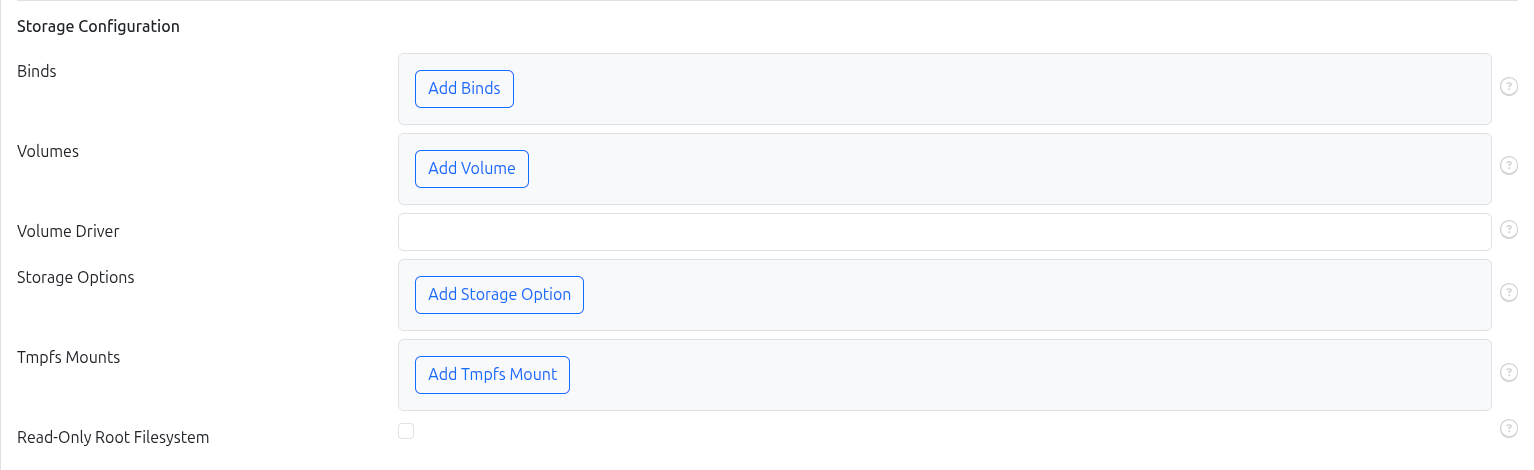
Configure volumes and bind mounts.
- Bind Mounts: Map host directories into the container. Lets both host and container see and modify the same files.
- Volumes: Docker-managed storage that persists data independently of the container lifecycle. For more detailed information on creating and managing volumes, refer to the Volumes management page.
- Volume Driver: Driver that container uses to mount volumes
- Storage Options: allows for specifying storage driver options when creating a container. The specific options available depend on the storage driver being used.
- Tmpfs Mounts: an in‑memory filesystem: data is stored in the host’s RAM (and possibly swap), not on disk, and disappears when the container stops.
- Read-only Mode: makes the container’s root FS read-only; the container can only write to:
- tmpfs mounts
- volumes / bind mounts you explicitly attach
Resource Limits
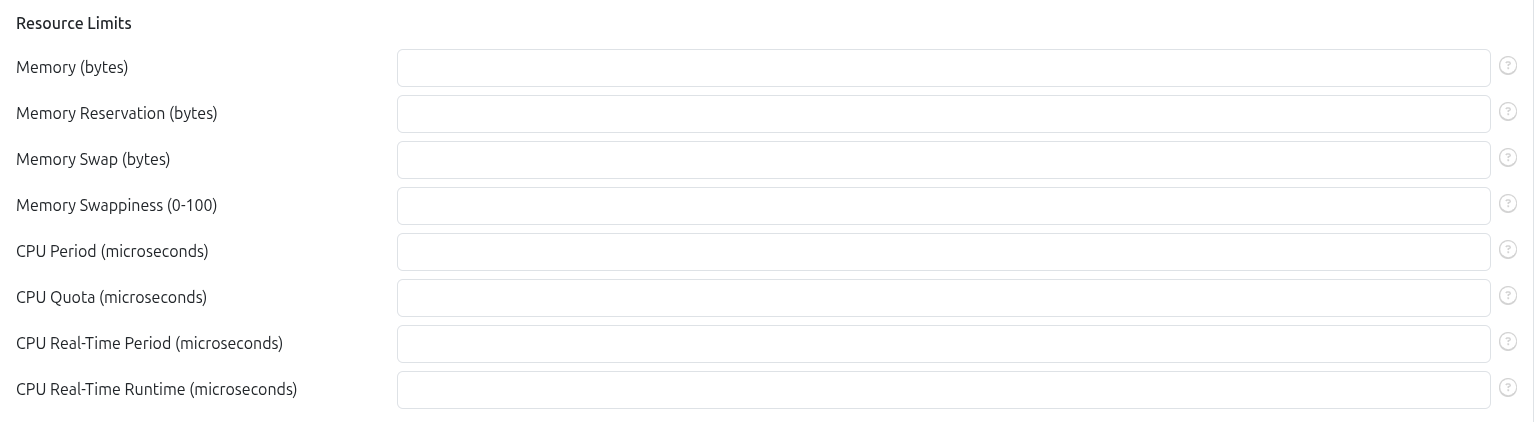
Set performance and usage restrictions for the container.
Memory: Defines the maximum amount of RAM (in bytes) available to processes in the container. The minimum allowed value is 6 000 000 bytes (≈6 MiB).
Memory Reservation: A soft memory limit, also specified in bytes. It serves as a hint to Docker and the kernel about how much memory the container should typically use.
- It must always be less than the hard Memory limit.
- The container can still use memory up to the hard limit.
- When the host is under memory pressure, Docker attempts to reclaim memory so that the container stays near or below the reservation value.
Memory Swap: Defines the total amount of RAM + swap, in bytes. This value only has effect if Memory is also set.
Rules:
If Memory Swap is set to a positive integer:
- Memory must also be set.
- Memory = maximum RAM (bytes).
- Memory Swap = total (RAM + swap), in bytes.
Example:
Memory = 314572800 bytes       (≈300 MiB)
Memory Swap = 1073741824 bytes (≈1 GiB)
→ Total allowed = 1 073 741 824 bytes → Swap size = 1 073 741 824 − 314 572 800 → ≈ 758 MiB of swap.
If Memory Swap = 0 → Ignored; treated as unset.
If Memory Swap = Memory and Memory > 0 → Container has no swap access (RAM only).
If Memory is set and Memory Swap is unset → Total allowed memory = Memory × 2, half RAM, half swap.
Example:
Memory = 314572800 bytes→ Total = 629 145 600 bytes → 314 572 800 RAM + 314 572 800 swap.
If Memory Swap = -1 → Unlimited swap, up to the host’s available swap space.
Memory Swappiness: controls how aggressively the kernel swaps out anonymous memory pages used by a container. It’s a percentage between 0 and 100.
0– turn off anonymous page swapping for the container.100– allow all anonymous pages to be swappable (most aggressive swapping).- If not set – the container inherits the host’s swappiness value.
CPU Period: sets the CFS (Completely Fair Scheduler) period for a container: the length of each CPU scheduling window, in microseconds. It’s used together with
CPU Quotato control how much CPU time a container can use in each period.- Default:
CPU Period = 100_000(100 ms). CPU Quotais the number of microseconds of CPU time allowed per period.- Effective CPU share =
CPU Quota / CPU Period.
- Default:
CPU Quota: sets a hard upper limit on CPU time a container can use per CFS period (used with
CPU Period).CPU Real-Time Period: configures the real‑time scheduler period for a container, in microseconds. It works together with
CPU Real-Time Runtimeand requires special kernel/daemon setup.It sets the length of the real‑time scheduling period for a container.
--cpu-rt-runtimethen specifies how many microseconds within that period the container may run at real‑time priority.Both values cannot exceed the limits configured on the daemon/parent cgroup, and require the host kernel to support real‑time scheduling with
CONFIG_RT_GROUP_SCHED.Requirements
To use
--cpu-rt-period/--cpu-rt-runtime:- Kernel must have
CONFIG_RT_GROUP_SCHEDenabled. - Docker daemon must be started with real‑time runtime configured, e.g.:
dockerd --cpu-rt-runtime=950000- Kernel must have
CPU Real-Time Runtime: See explanation for
CPU Real-Time Period
Security & Capabilities

Control container privileges and security-related settings.
Privileged Mode – gives a container almost the same power as the host, bypassing most isolation. Use it only when absolutely necessary. Makes these changes for the container:
- Enables all Linux kernel capabilities (no capability dropping).
- Disables the default seccomp profile.
- Disables the default AppArmor profile.
- Disables the SELinux process label.
- Grants access to all host devices.
- Makes
/sysread‑write. - Makes cgroups mounts read‑write.
In other words, the container can then do almost everything the host can do. Recommended practice:
Avoid --privileged for normal workloads. Prefer adding only the specific capabilities you need with
Cap Add.Cap Add: add specific Linux kernel capabilities to a container, instead of giving it full privileges with
Privileged. For list of available capabilities refer to the Docker DocumentationCap Drop: Remove default capabilities.
Runtime & Environment

Set runtime behavior and environment variables.
Restart Policy – Define what happens if the container exits. Supported policies:
No(default)
Don’t automatically restart the container.On Failure
Restart only if container exits with a non‑zero status.Always
Always restart if the container stops.
If manually stopped, it’s restarted only when the Docker daemon restarts or you manually start it again.Unless Stopped
Likealways, except if the container is stopped (manually or otherwise), it isn’t restarted after a Docker daemon restart.
Environment Variables – JSON array of environment variables in
"key": "value"format
Device Mappings

Expose specific host devices to the container.
- Device Mappings – Map host devices into the container (e.g.,
/dev/ttyUSB0). Useful for hardware-dependent workloads.
Note: On the right side of every field there is
icon. Hovering over it displays a short tooltip explaining the purpose of that field.